The Porter Cable Air Compressor has a reset button that can be used to restart the machine if it fails to turn on. To troubleshoot the issue, check if the power cable is connected properly and if the switches are in the correct position.
You may also need to replace fuses, reset breakers, check the pressure switch, and activate the reset button to restore power to the compressor. Having trouble starting your Porter Cable Air Compressor? One possible solution is to locate the reset button on the machine.
This reset button can help restart the compressor if it fails to turn on. However, before pressing the reset button, it is important to check if the power cable is connected properly and if the switches are in the right position. Additionally, you may need to replace fuses, reset breakers, examine the pressure switch, and activate the reset button to restore power to the compressor. We will explore how to troubleshoot and fix common issues with the Porter Cable Air Compressor.

Credit: www.amazon.com
Common Symptoms Of A Reset Button Issue
When it comes to troubleshooting an air compressor, one common issue that users may encounter is a problem with the reset button. The reset button serves as a safety feature that automatically shuts off the compressor when it detects an electrical overload. If this reset button malfunctions, it can prevent the compressor from starting or cause it to trip frequently. Below are some common symptoms of a reset button issue that you should be aware of:
1. Air compressor not starting
If your air compressor fails to start when you power it on, it could be due to a problem with the reset button. The reset button may not engage properly or may be stuck in the tripped position, preventing the compressor from receiving power. In such cases, it is essential to inspect and troubleshoot the reset button to identify the issue and rectify it.
2. Power cable and switch inspection
Before assuming that the reset button is the culprit, it is crucial to inspect the power cable and switch. Ensure that the power cable is securely connected to both the compressor and the power source. Check for any signs of damage or wear on the cable that may be affecting the flow of electricity. Similarly, inspect the switch to ensure it is functioning correctly, as a faulty switch can also prevent the compressor from starting. By conducting a thorough inspection of the power cable and switch, you can eliminate any potential causes before focusing on the reset button.
3. Fuses and breakers check
In addition to inspecting the power cable and switch, it is important to check the fuses and breakers associated with the compressor’s electrical system. Faulty fuses or tripped breakers can interrupt the power supply to the compressor, resulting in it not starting. Consult the user manual or refer to the manufacturer’s guidelines to locate and inspect the fuses and breakers. Replace any blown fuses or reset any tripped breakers as needed to restore power to the compressor.
4. Pressure switch examination
The pressure switch is another component that can contribute to a reset button issue. A malfunctioning pressure switch may not send the correct signal to the reset button, causing it to trip unnecessarily or fail to reset correctly. Inspect the pressure switch for any signs of damage or wear and ensure that it is properly connected to the compressor’s electrical system. If necessary, replace the pressure switch with a new one to resolve any issues with the reset button.
In conclusion, when troubleshooting an air compressor with a reset button issue, be on the lookout for common symptoms such as the compressor not starting, conducting a thorough inspection of the power cable and switch, checking fuses and breakers, and examining the pressure switch. By addressing these areas, you can identify and resolve the underlying issue with the reset button, allowing your air compressor to function properly once again.
Reset Button Location And Functionality
Identifying the reset button
In order to understand the reset button location and functionality on your Porter Cable air compressor, it is important to first identify where the reset button is situated. The reset button can typically be found on the control panel of the air compressor. It is often labeled with the word “Reset” or represented by the universal reset symbol.
Understanding the purpose of the reset button
The reset button on a Porter Cable air compressor serves a crucial purpose in ensuring the proper functioning of the machine. Its main function is to protect the air compressor from overload or overheating by cutting off power to the motor when certain conditions are met. This can occur when the motor becomes too hot or when excessive current flows through the system.
When the reset button is pressed, it resets the internal mechanism of the air compressor and allows the motor to restart. This can be particularly useful in cases where the air compressor fails to start or experiences a fault that triggers the safety mechanism.
To utilize the reset button effectively, it is important to familiarize yourself with the specific instructions provided by Porter Cable in your air compressor’s user manual. Different models may have slight variations in terms of reset button location and functionality.
It is worth noting that the reset button should only be pressed after identifying and addressing the root cause of the issue that triggered the safety mechanism in the first place. Pressing the reset button without resolving the underlying problem may result in the air compressor continuously tripping the circuit or potentially causing damage to the motor.
If you are unsure about the cause of a malfunction or need assistance with troubleshooting, it is recommended to consult a professional or refer to the Porter Cable customer support for guidance specific to your air compressor model.
Resetting The Air Compressor
Unplugging the compressor
Before resetting the air compressor, the first step is to ensure it is completely disconnected from any power source. Unplugging the compressor is crucial for safety reasons.
Removing the cover
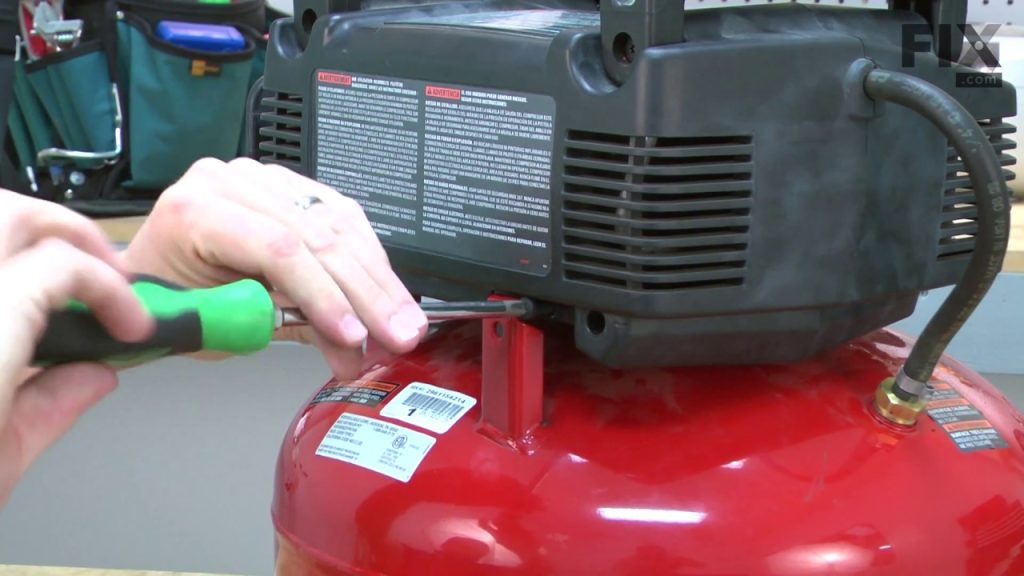
Once the compressor is unplugged, the next step is to remove the cover. This can usually be done by unscrewing the screws or using a screwdriver to pry it off. It is important to be gentle during this process to avoid any damage to the cover or the compressor.
Inspecting and labeling the switch
After the cover is removed, it is time to inspect and label the reset switch. Take a close look at the switch and make sure there are no visible signs of damage or wear. Use a marker to label the switch for easy identification during the reset process.
Applying superglue to contacts
Once the switch is labeled, it’s time to apply superglue to the contacts. Apply a small amount of superglue onto each contact, making sure to cover the entire surface evenly. This will help ensure a strong and secure connection when the switch is reattached.
Reattaching the switch
With the superglue applied, carefully reattach the switch to its original position. Make sure it is aligned properly and securely fastened in place. Take your time during this step to ensure the switch is correctly positioned for optimal performance.
Connecting to a power source
Once the switch is securely reattached, it’s time to connect the air compressor to a power source. Double-check that everything is properly plugged in and that there are no loose connections. Ensure the power source is stable and free from any potential hazards before turning on the compressor.
By following these steps, you can effectively reset your Porter Cable air compressor and get it back up and running smoothly. Remember to always prioritize safety and take your time during each step for the best results.
Replacing The Pressure Switch
Importancce of the Pressure Switch
The pressure switch is a crucial component of an air compressor as it is responsible for monitoring the system’s pressure and automatically shutting off the compressor when it reaches the desired pressure level. This not only prevents excessive pressure buildup but also helps to protect the compressor from potential damage. Additionally, the pressure switch ensures that the compressor runs efficiently and optimally by automatically turning it on when the pressure drops below a certain level. Without a functioning pressure switch, the air compressor may not operate properly and may pose safety risks.
Common symptoms of a faulty pressure switch
If the pressure switch in your Porter Cable air compressor is faulty, it may exhibit several symptoms. Here are some common signs to look out for:
- The compressor does not turn on or fails to build up pressure.
- The compressor continuously runs without shutting off.
- The pressure relief valve releases air constantly.
- The compressor cycles on and off too frequently.
Disassembling the compressor
Before replacing the pressure switch, it is necessary to disassemble the compressor. Here’s a step-by-step guide:
- Disconnect the air compressor from the power source to ensure safety.
- Remove any remaining air pressure from the tank by opening the drain valve.
- Locate the manifold cover, which is usually located on top of the compressor.
- Remove any screws or fasteners holding the manifold cover in place.
- Carefully lift off the manifold cover to access the internal components of the compressor.
Removing the manifold cover
To remove the manifold cover, follow these steps:
- Identify the screws or bolts that secure the manifold cover to the compressor.
- Use a suitable screwdriver or wrench to loosen and remove the screws.
- Gently lift off the manifold cover, taking care not to damage any of the internal components.
Replacing the pressure switch
Now that you have access to the pressure switch, you can proceed with replacing it:
- Identify the pressure switch, which is typically located near the tank or compressor pump.
- Disconnect the wires connected to the pressure switch terminals.
- Unscrew the pressure switch from its mounting bracket using the appropriate tools.
- Install the new pressure switch by screwing it into the mounting bracket and reconnecting the wires.
- Ensure that all connections are secure and tight.
Reassembling the compressor
After replacing the pressure switch, it’s time to reassemble the compressor:
- Place the manifold cover back onto the compressor, aligning the screw holes.
- Secure the manifold cover by inserting and tightening the screws or bolts.
- Double-check that all screws are tight and properly fastened.
Once you have followed these steps and reassembled the compressor, you can reconnect it to the power source and test its functionality. If the pressure switch replacement was successful, the compressor should now operate properly, building up pressure and shutting off when the desired level is reached.
Troubleshooting The Pressure Sensor And Valve
Examining the pressure sensor
If your Porter Cable air compressor is not functioning properly, one of the first components you should examine is the pressure sensor. The pressure sensor is responsible for detecting the air pressure inside the tank and sending a signal to the pressure switch to turn the compressor on or off accordingly. To troubleshoot the pressure sensor, follow these steps:
- Disconnect the power supply to the compressor.
- Locate the pressure sensor, usually mounted on the side of the compressor tank.
- Inspect the sensor for any visible damage or signs of wear.
- Check the electrical connections to ensure they are secure.
- If the sensor appears to be faulty, it may need to be replaced. Refer to the manufacturer’s instructions or consult a professional for assistance.
Replacing the pressure valve
The pressure valve in your air compressor is responsible for regulating the air pressure inside the tank. If the pressure valve is not functioning correctly, it can cause issues such as excessive pressure build-up or inadequate pressure. To replace the pressure valve, follow these steps:
- Disconnect the power supply to the compressor.
- Locate the pressure valve, usually located on the manifold of the compressor.
- Using a wrench or pliers, loosen the fittings connecting the pressure valve to the manifold.
- Remove the old pressure valve and discard it.
- Install the new pressure valve by tightening the fittings securely.
- Ensure all connections are tight and leak-free.
Inspecting the pressure relief valve
The pressure relief valve is an important safety feature of your air compressor. It is designed to release excess pressure from the tank when it exceeds a certain limit. If the pressure relief valve is faulty, it may not function correctly, which can lead to dangerous pressure build-up. To inspect the pressure relief valve, follow these steps:
- Disconnect the power supply to the compressor.
- Locate the pressure relief valve, usually positioned on the top or side of the tank.
- Inspect the valve for any signs of damage or corrosion.
- Check the valve’s operation by manually lifting the lever. It should move freely and return to its original position once released.
- If the valve is not working properly, it may need to be replaced. Consult the manufacturer’s instructions or seek professional assistance.
Checking the pressure release valve
The pressure release valve, also known as the unloader valve, is responsible for releasing air from the compressor head when the motor shuts off. This ensures that there is no pressure build-up in the pump or tank during shut down. To check the pressure release valve, follow these steps:
- Disconnect the power supply to the compressor.
- Locate the pressure release valve, typically located near the pressure switch or pressure regulator.
- Inspect the valve for any visible damage or signs of wear.
- Check the valve’s operation by activating the compressor. The valve should release air when the motor shuts off.
- If the valve is not functioning correctly, it may need to be replaced. Refer to the manufacturer’s instructions or consult a professional for assistance.
Understanding the pressure regulator
The pressure regulator is responsible for controlling the output pressure of your air compressor. It allows you to set the desired pressure level for your specific application. To understand the pressure regulator, follow these points:
- The pressure regulator is typically located near the outlet of the compressor.
- You can adjust the pressure setting by turning the knob or dial on the regulator.
- Make sure to set the pressure to the appropriate level for your intended use.
- If you experience issues with pressure consistency or regulation, the pressure regulator may need to be replaced. Consult the manufacturer’s instructions or seek professional assistance.
Replacing the switch and hose clamp
If you have examined all other components and are still experiencing issues with your Porter Cable air compressor, it may be necessary to replace the switch and hose clamp. To replace these components, follow these steps:
- Disconnect the power supply to the compressor.
- Locate the switch and hose clamp, usually positioned near the motor or pressure switch.
- Using the appropriate tools, disconnect the electrical connections to the switch and remove the hose clamp.
- Install the new switch and hose clamp, ensuring all connections are secure.
- Double-check all connections and ensure there are no leaks or loose fittings.
By troubleshooting and inspecting the pressure sensor and valve components of your Porter Cable air compressor, you can identify and resolve any issues that may be preventing your compressor from functioning at its best. Regular maintenance and prompt repairs will help ensure the optimal performance and longevity of your air compressor.
Additional Resources
When it comes to troubleshooting your Porter Cable air compressor and finding the reset button, there are several additional resources that can help you out. Whether you need to find specific parts for your compressor, locate a service center, or learn how to troubleshoot common issues, these resources will provide you with the information you need to get your compressor up and running again.
Porter Cable Compressor Parts
If you’re in need of replacement parts for your Porter Cable air compressor, it’s important to know where to find them. The official Porter Cable website offers a wide range of genuine parts that are specifically designed for their compressors. From pressure switches to valves and hoses, you can easily find the parts you need to repair your compressor and ensure it performs at its best.
Porter Cable/DeWalt Service Centers
If you’re unable to troubleshoot or repair your air compressor on your own, it may be necessary to visit a service center. Porter Cable and DeWalt have authorized service centers located throughout the country. These centers are staffed with trained professionals who can diagnose and repair any issues you may be experiencing with your air compressor. Visiting a service center ensures that your compressor is repaired correctly and with genuine parts.
Where to Find the Reset Button on Your Compressor
Knowing where to find the reset button on your air compressor is crucial when troubleshooting. The location of the reset button may vary depending on the model of your compressor, but it is typically located near the motor or on the control panel. To locate the reset button on your specific model, refer to the user manual provided with your compressor. If you’re unable to find the manual, you can often find it on the manufacturer’s website or by contacting their customer support.
Troubleshooting Guide for Air Compressor Not Starting
If your air compressor is not starting, it can be frustrating and may impact your work or projects. Fortunately, there are troubleshooting steps you can take to identify and resolve the issue. Some common reasons for an air compressor not starting include a disconnected power cable, incorrect switch position, blown fuses, or a faulty pressure switch.
The video resources provided below offer step-by-step instructions on checking these potential problems and how to activate the reset switch to restore power to your compressor.
Additional Resources Video:
- Air Compressor Won’t Turn On? Here’s How To Fix It! – Jimmy’s Garage
- Porter Cable Air Compressor Repair – How to replace the Pressure Switch – Fix.com
- Porter Cable Compressor Pressure Switch Won’t Shut Off repair – Rob’s Fixit Shop
Remember, when troubleshooting your air compressor, it’s important to follow the manufacturer’s instructions and safety precautions. If you’re unsure or uncomfortable performing any repairs or troubleshooting steps on your own, it’s best to seek assistance from a trained professional or visit a service center.
Frequently Asked Questions On Porter Cable Air Compressor Reset Button
Where Is The Reset Button On My Compressor?
The reset button on your compressor may be located at the end of the motor’s housing. Look for a small-sized button.
Why Won’T My Air Compressor Restart?
If your air compressor won’t restart, check if the power cable is connected and the switches are in the correct position. Also, inspect and replace fuses, reset breakers, check the pressure switch, and activate the reset switch if needed to restore power.
Why Does My Air Compressor Just Hums When I Turn It On?
When your air compressor just hums and doesn’t turn on, it could mean that the motor is damaged or worn out. Overheating, wear and tear, or internal faults can cause this issue. Check for blown fuses or tripped breakers, and also look for a reset button on the motor’s housing.
Does An Air Compressor Have A Fuse?
Yes, an air compressor may have a fuse or a reset switch that needs to be checked if it won’t turn on. Look for either a blown fuse or a tripped breaker and replace or reset it accordingly.
Conclusion
If your Porter Cable Air Compressor is not turning on, there are several troubleshooting steps you can take to fix the issue. Start by checking if the power cable is connected properly and if the switches are in the correct position.
You should also inspect and replace any blown fuses or reset breakers. Additionally, some models have a reset button located on the motor housing, so make sure to look out for it. By following these steps, you can get your air compressor up and running again in no time.


